The
 blog
blog
Track SEN cohorts
23rd October 2019 | Chris O'Mahony
User fields allow you to store extra details about your users, like SEN provisions, EAL, gender, address, month of birth and much more! You can use this information to filter your data in the Vizi dashboards and understand how different cohorts are performing. You can also view tags for user fields in the markbook, the student homepage and the seating plan to immediately get extra context about a user.
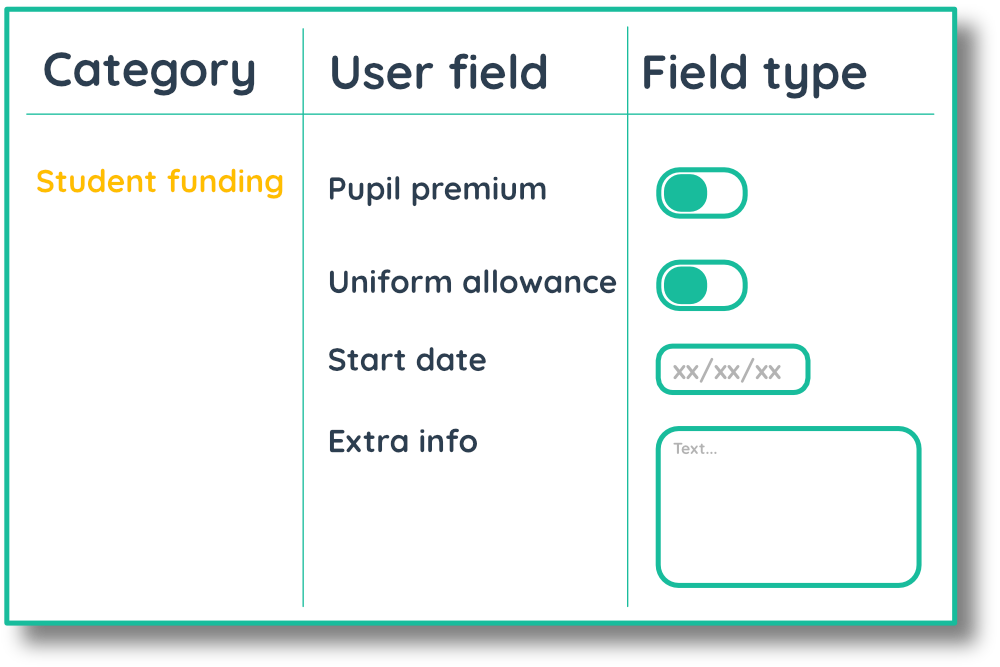
User fields are organised by 'user field categories' and within these categories you store the 'user fields'. Each user field can store text, dates, numbers or yes/no data.
If you integrate with your MIS, you can automatically pull through user fields to Vizi. Upon integration, Vizi will automagically create user field categories and user fields and populate these with student details stored in your MIS.
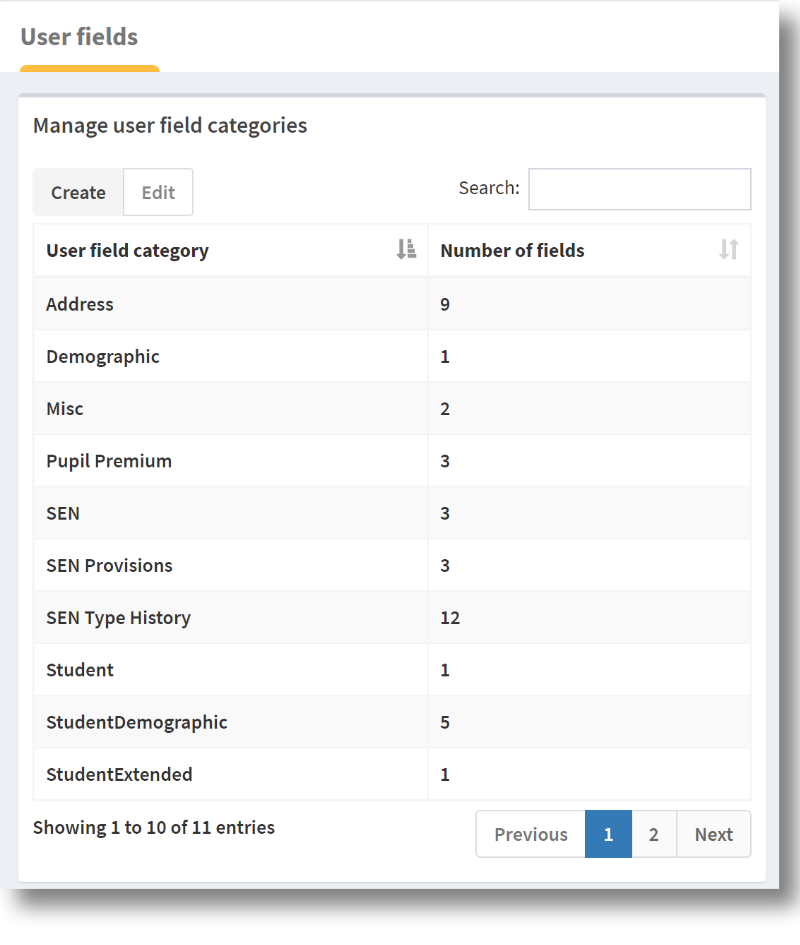
Creating user field category
ADMIN OPTIONS [User settings] > [User fields] > 'Create'To begin with, you must create a user field category. A category can be things like ‘SEN Provisions’ or ‘Funding information’. Click 'User fields' in the sidebar, click 'Create' above the data table and enter the name of the category you would like to create.

As you create more user field categories, you will build up your data table with categories. You can see how many user fields you have recorded in a user field category.
Adding fields to a category
ADMIN OPTIONS [User settings] > [User fields] > 'Edit' > 'Add field'Once you have created a user field category, you can begin to add fields to that category. These fields will appear when editing a user, allowing you to enter extra information about a user. Within the category funding for example, you may wish to add fields that contain information about Pupil Premium, or Free School Meals eligible.

Editing user fields
ADMIN OPTIONS [User settings] > [User fields] > 'Edit' > 'Add field'
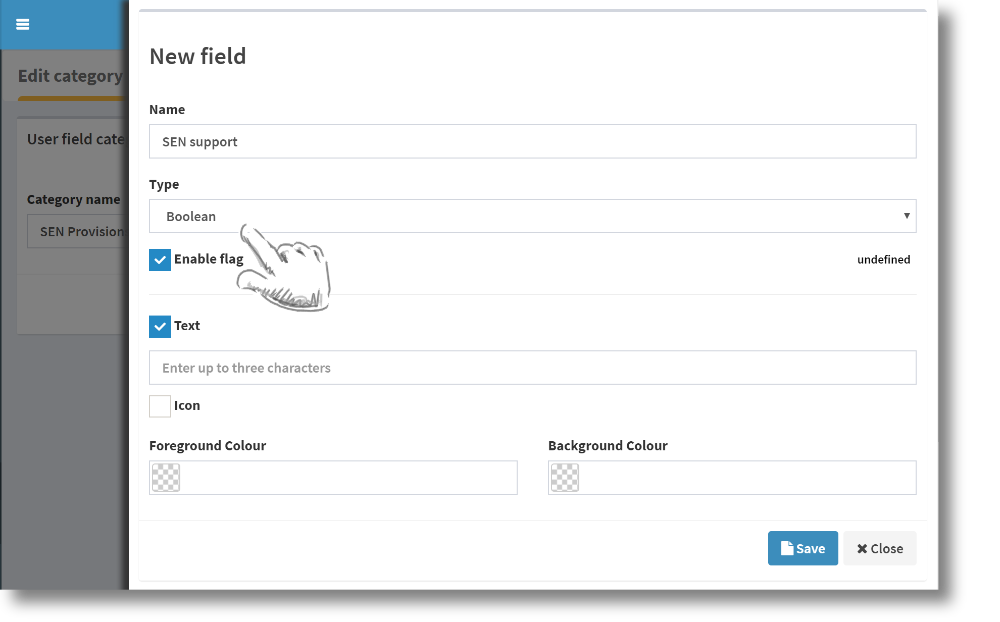
Creating and editing a user field allows you to specify what type of information you would like to record about your students. Once you have entered the name of the user field, select the type of data you would like to record.
By selecting Boolean (yes/no), Vizi gives you the option to create a flag for the user field. This flag will appear on a student's profile and in the markbook when the user field is selected for the student. You can select whether you would like to record text or an icon and choose the foreground and background colour for the flag.
Adding user fields to users
ADMIN OPTIONS [User settings] > [Users] > 'Edit'Once you have created your user fields you can begin to add details to your students. Click on the users option in the sidebar and search for users in the users table. Select the user you would like to add information for and click the edit button.
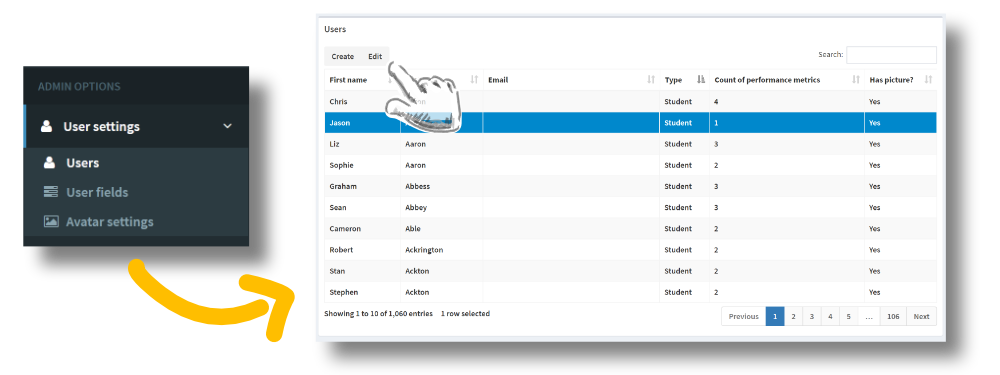
Once you have created your user fields, you can enter information in to the input boxes and check boxes for the user.
Viewing user fields
Once you have recorded information in user fields for your users, you can view that information in several places. To get an overview of the information you have recorded, go to a user's homepage by clicking on that user or searching for them in the search bar.
If you have created a flag for a user field and checked the box for a student, that flag will appear next to the student in the markbook.
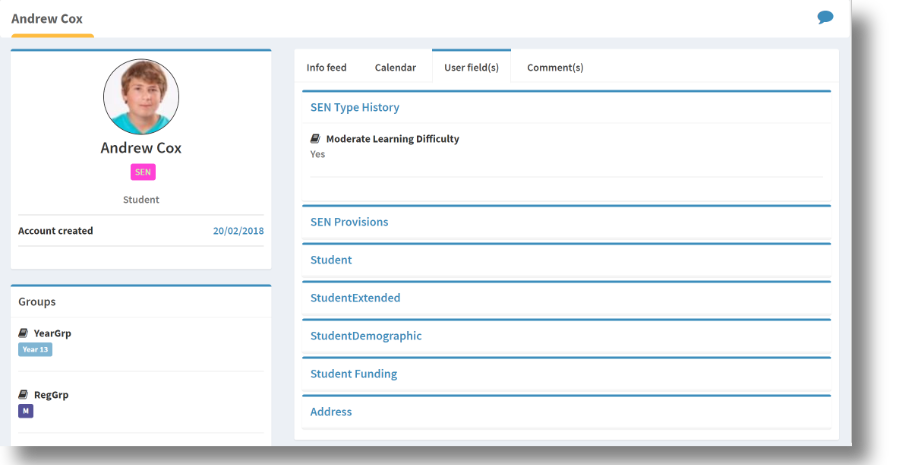
You can also add charts for user fields to the Vizi dashboards. By adding a chart for a user field you can see the performance and progress of different cohorts of students and filter using that user field.
You can search for a user field in the search box. This will give you an overview of the user field or user field category.
If you have created a flag for a user field, the flag will appear next to the student in the markbook and in the seating plan.
Other articles you may be interested in
25th November 2021 10 mins
Blog post
15th January 2020 10 mins
Blog post
Data driven schools
Read more7th August 2019 5 mins
How to
Setting targets and metrics
Read more7th June 2019 10 mins
Blog post
Encouraging marking standardisation
Read more4th April 2019 10 mins
Blog post
Machine learning in education
Read more4th December 2018 10 mins
How to
Creating a seating plan
Read more2nd August 2018 10 mins
How to
Using assessment breakdowns
Read more12th April 2018 10 mins
Blog post
How can data-viz help improve student outcomes?
Read more3rd February 2018 5 mins
Blog post
Time to get my head around the 1-9 grading system
Read more25th August 2017 10 mins
Blog post