The
 blog
blog
Using assessment breakdowns
2nd August 2018 | Chris O'Mahony
Breaking down an assessment into sections, questions, topics and more can be hugely useful when you want to understand your student's progress for important assessments. With Vizi you can record mulitple levels of data and use the Vizi dashboards to understand your student's progress.
Common examples of breakdowns are skills based breakdowns and question by question breakdown. For a skills breakdown, you may have created an assessment named 'January progress' and in that have a breakdown for reading, writing and maths.
A question by question breakdown might have 3 different sections, and 3 different questions in each of those sections.
Adding a breakdown
Once you have created an assessment you will see the assessment homepage, from here you can add a breakdown to that assessment to record extra levels of detail for that assessment.
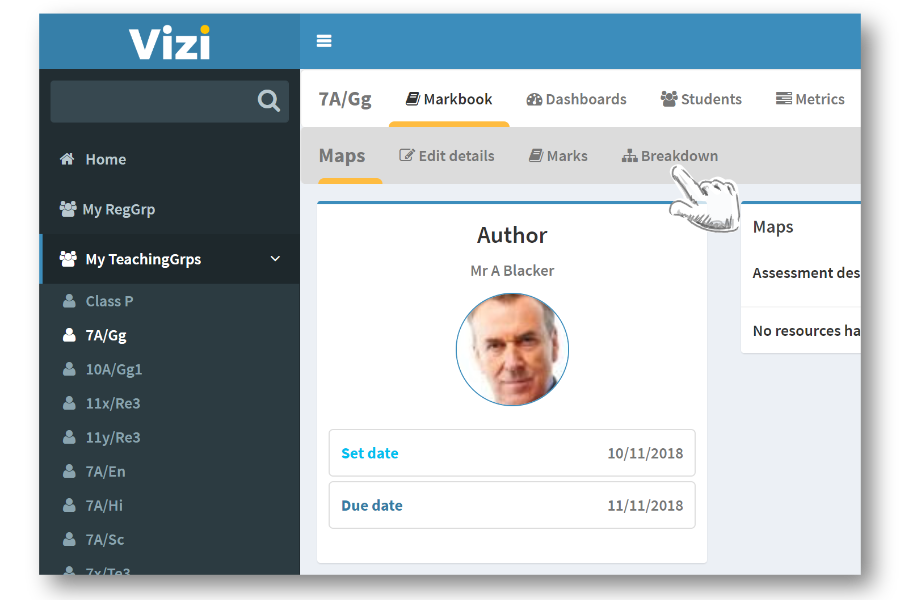
Creating a breakdown
Once you have clicked on the breakdown option in the navbar, you can either start to create your breakdown or copy a breakdown that has already been created by you or a colleague.
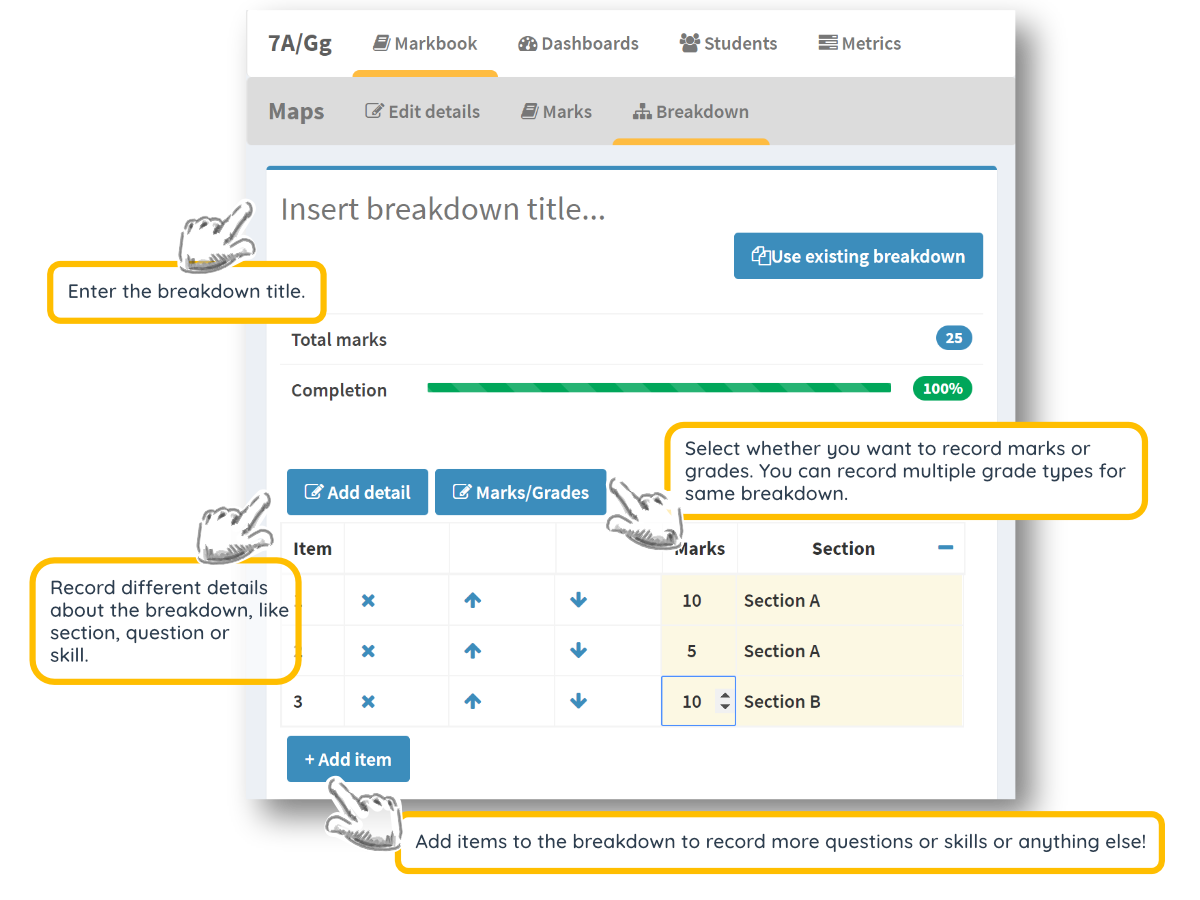
To begin with, it is useful to think about the detail you want to record about an assessment. A detail might be question or section or topic relating to that assessment.
You can begin to add different levels or rows to your breakdown. These convert to the number entries you record for each student. So if an assessment had nine questions, you would add nine items. For each of these items you can define the context (the question, section, etc.). So for my first row, I might write 'Question 1' for the context question and 'Section A' for section. In the next row I might write 'Question 2' and 'Section A' and so on.
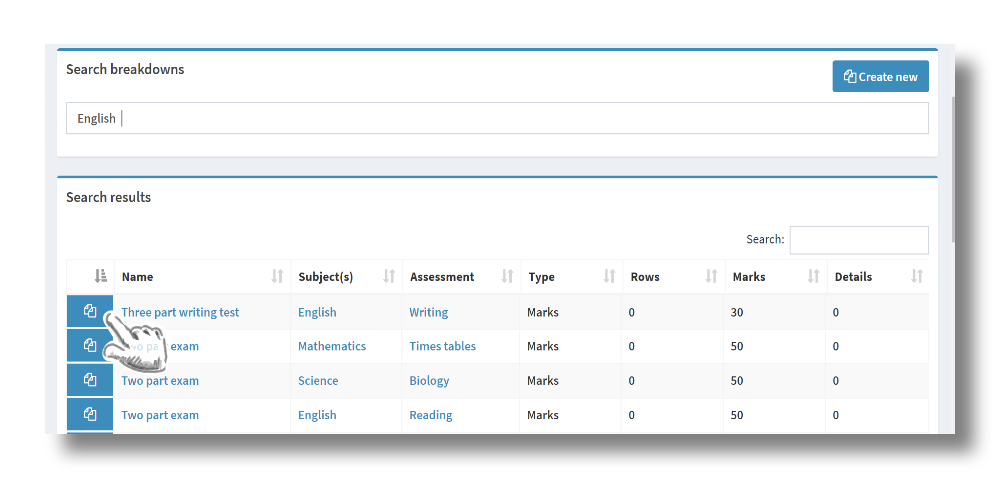
Reusing an existing breakdown
Rather than creating a new breakdown for an assessment you can use a breakdown that you have previously created or has been created by a colleague.
Just search for the name or subject or author of the breakdown and click the copy button next to the assessment to reuse the layout.
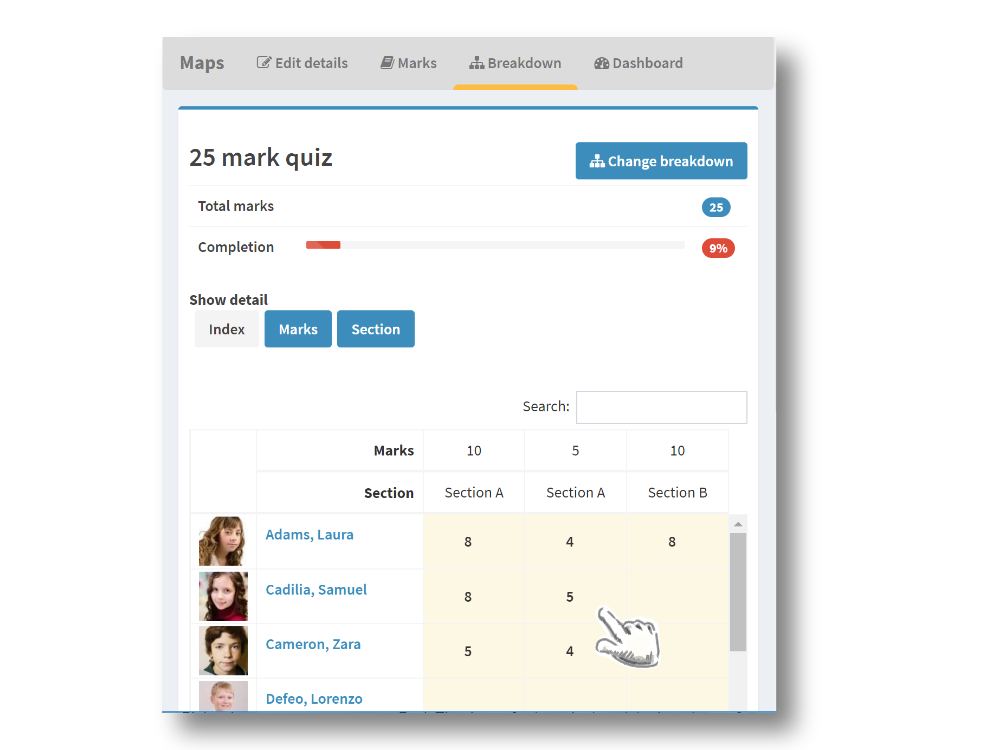
Adding marks and grades
Once you have created or copied a breakdown, the breakdown tab will now show the marks or grades entry screen. Enter the marks or grades for your students for the relevant sections of your breakdown.
If you record marks in the breakdown, the sum of the marks will be shown in the marks tab of the assessment. This is designed to give an overall summary of a student's performance for that assessment.
Viewing the assessment dashboard
Having entered data for the breakdown, Vizi will create a dashboard for that assessment. Here you can study the detail behind your results.
- What questions do my students particularly struggle with?
- Which topics do they excel in?
- What is the average mark for section A?
Was this how-to useful? Give us any feedback you have using the contact form below.
Other articles you may be interested in
25th November 2021 10 mins
Blog post
4th November 2021 10 mins
Blog post
The ECT guide to registration codes
Read more12th October 2021 10 mins
Blog post
Exams 2022 - have your say
Read more15th January 2020 10 mins
Blog post
Data driven schools
Read more7th August 2019 5 mins
How to
Setting targets and metrics
Read more7th June 2019 10 mins
Blog post
Encouraging marking standardisation
Read more1st February 2019 10 mins
Blog post
Managing student wellbeing with data
Read more4th December 2018 10 mins
How to
Creating a seating plan
Read more30th June 2018 5 mins
How to
Creating an assessment
Read more25th August 2017 10 mins
Blog post