The
 blog
blog
Creating a seating plan
4th December 2018 | Chris O'Mahony
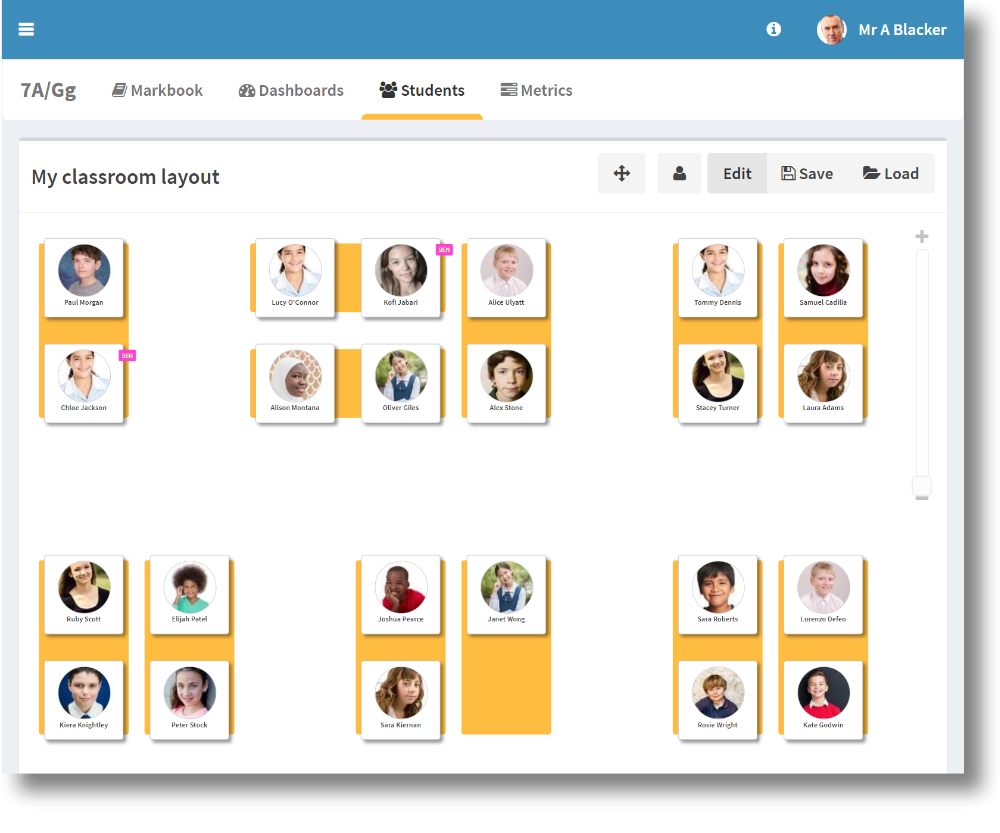
Vizi's seating planner helps you to create the best seating plan for your classroom!
Drag and drop students and tables on to your seating plan and view user field flags (like SEN, EAL, etc.) associated to students to help create a seating plan that works best for your class.
Click on students to see further details and pan and zoom over your seating plan to see the whole class.
Creating your seating plan
SIDEBAR [Group Type] > [Group] > NAVBAR 'Students'
To begin with, select the group you would like to create a seating plan for in your sidebar. Click 'Students' in the navbar and you will see all your students for that group. Select the 'Edit' button to begin creating your seating plan!
Students
You can add students to your seating plan individually, by dragging them from the student/table container at the top of the page. You can add students to the grid directly, or you can place them on top of tables.
Tables
You can add tables to your grid and place your students on the tables. You can build up blocks or rows of tables to reflect your classroom layout.
Settings
SIDEBAR [Group Type] > [Group] > NAVBAR 'Students'
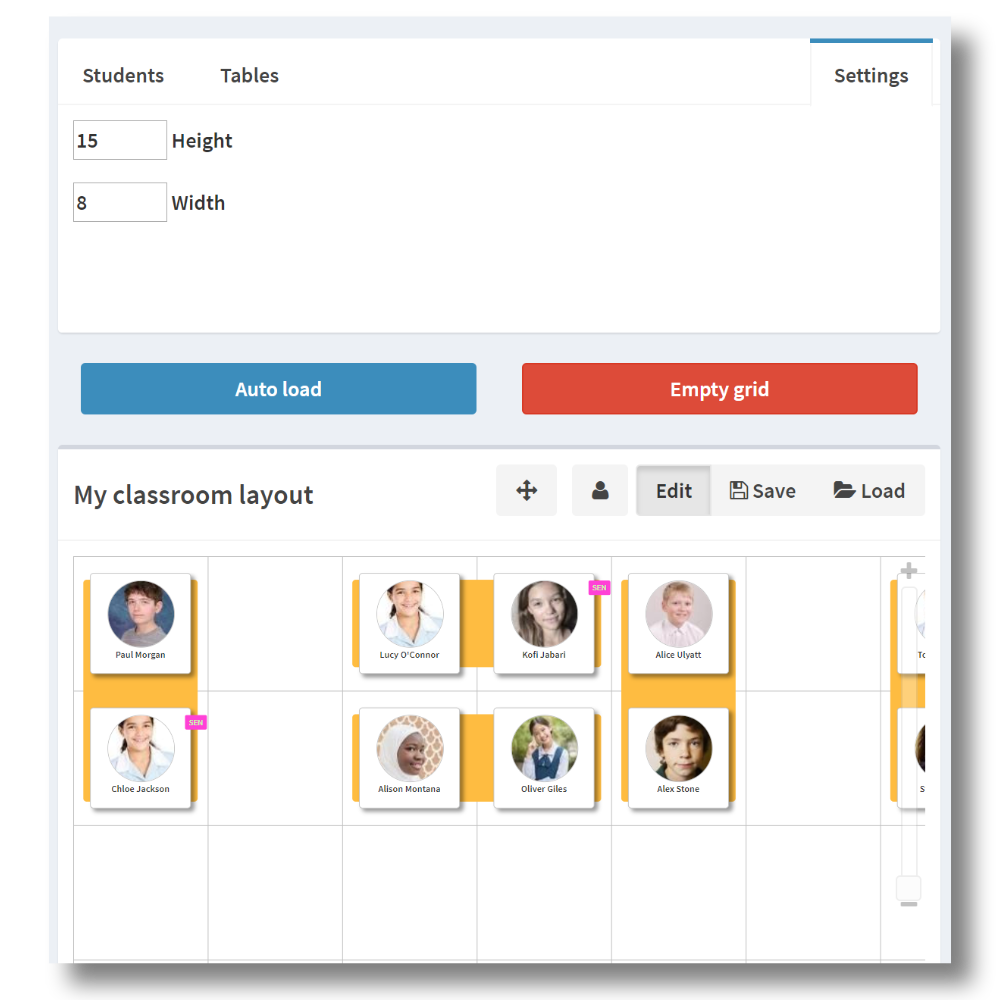
Grid size
In the settings tab of the student/table container at the top of the page, you can adjust the size of the background grid you use to create your seating plan. Create a large grid if you are creating a plan for a big class with lots of tables and students, and a smaller one if you are creating a plan for a small class.
Simple and advanced
You can change the appearance of students on your grid by selecting the silhouette button. You can toggle between a simple view, that just shows the student image and hide sensitive information or a detailed view that shows the student picture and all user field flags associated with that student.
Auto-fit
Use the auto-fit button to move back to the default zoom settings. This means your entire seating plan will be visible on the screen.
Save and load
SIDEBAR [Group Type] > [Group] > NAVBAR 'Students'
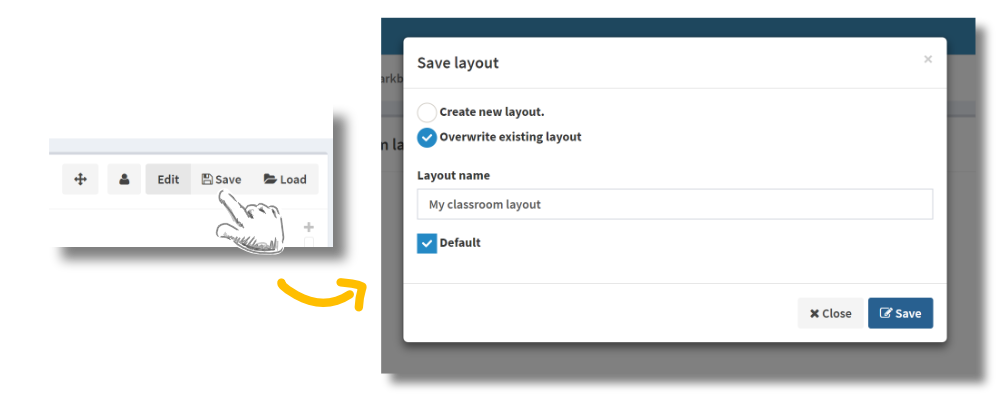
Once you have created your seating plan you can save it by clicking the save button, typing in the name of the seating plan and clicking the save button. By selecting 'Default' checkbox, the plan will load every time you click students in the navbar, for that group. You can update the seating plan by saving it again, or you can save it as a new seating plan!
You can also click the load button to retrieve a previously saved layout.
View your seating plan
SIDEBAR [Group Type] > [Group] > NAVBAR 'Students'You can toggle between the edit mode and the view mode using the 'Edit' button. In the view mode, you can see your arranged seating plan and click on students to view their details.
You can quickly move around your seating plan by dragging your mouse or finger across the screen. You can also zoom in and out using your scroll on your mouse or trackpad or by pinching with your fingers.
Other articles you may be interested in
25th November 2021 10 mins
Blog post
15th January 2020 10 mins
Blog post
Data driven schools
Read more3rd December 2019 10 mins
Blog post
Peer to peer grading
Read more23rd October 2019 10 mins
How to
Track SEN cohorts
Read more7th August 2019 5 mins
How to
Setting targets and metrics
Read more7th June 2019 10 mins
Blog post
Encouraging marking standardisation
Read more4th April 2019 10 mins
Blog post
Machine learning in education
Read more2nd August 2018 10 mins
How to
Using assessment breakdowns
Read more1st November 2017 5 mins
Blog post
6 steps to follow to create a good data environment for your school
Read more25th August 2017 10 mins
Blog post