The
 blog
blog
Setting targets and metrics
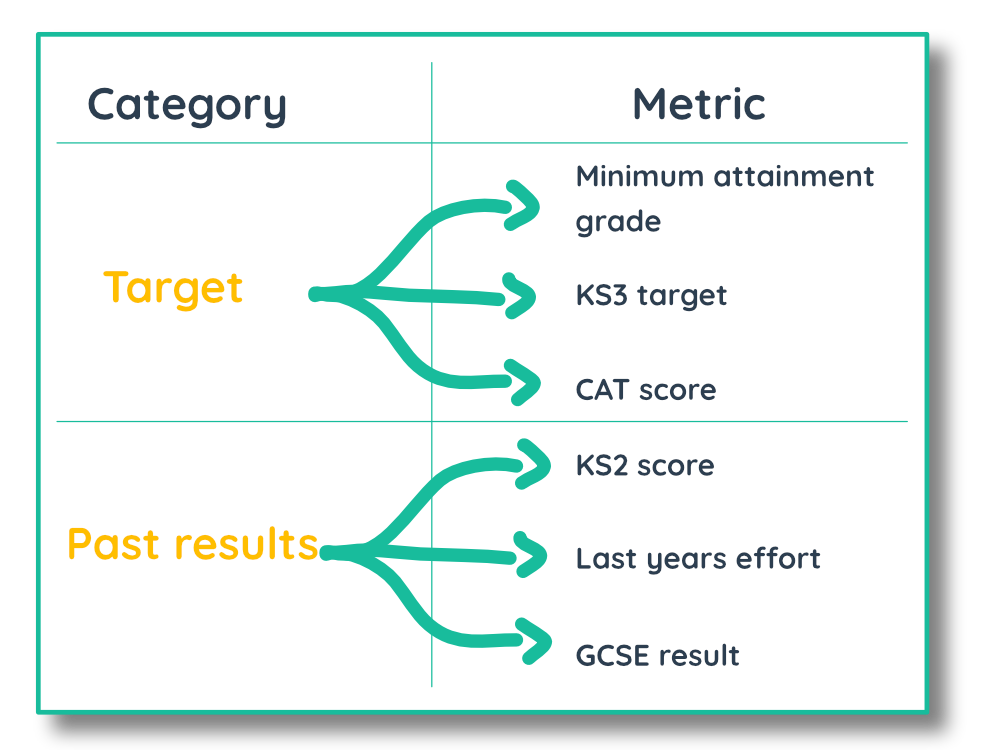
7th August 2019 | Chris O'MahonyMetrics can be any academic information that you might want to use as a reference point for your students. Metrics can include (but aren’t restricted to!):
- Previous working at level
- KS2/KS3/KS4/KS5 Results
- Targets
- Minimum attainment grade
- Stretch goal
A common metric category is 'Targets' and common metrics you could have within this category include 'Ability Target' and 'Minimum Attainment level'.
Creating metric category
ADMIN OPTIONS [Metrics] > [Metric categories] > 'Create'
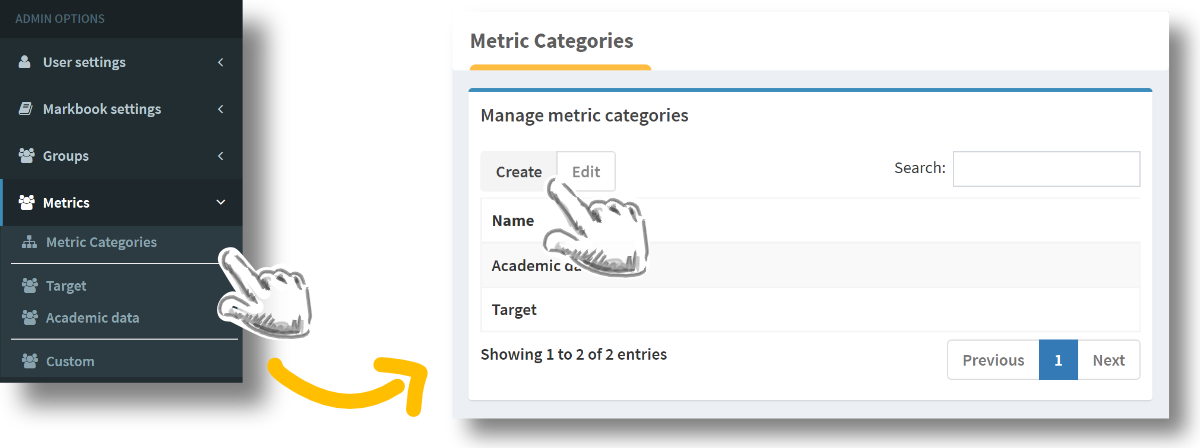
To begin with, you need to make a metric category. Click on the 'Metric categories' in the side bar under the metrics heading. Click the create button to add your metric category.
Once you have created a metric category it will appear in the sidebar under the metrics title.
Adding metrics
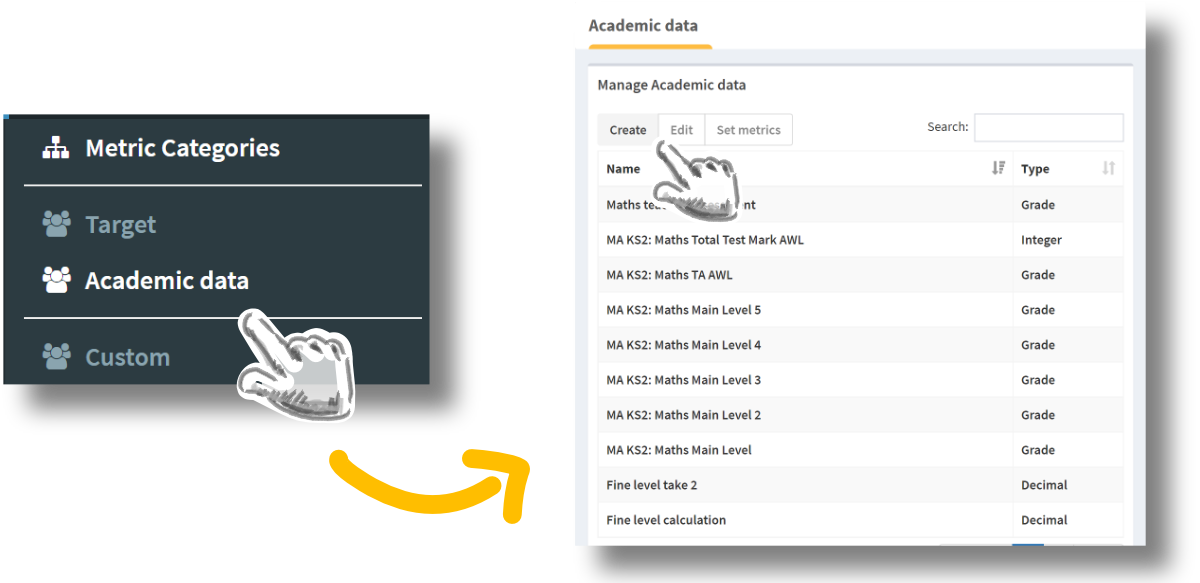
ADMIN OPTIONS [Metrics] > [Metric category] > 'Create'To create metrics, click on the metric category for which you want to create the metric. Click the create button to fill in the metric details.
Metric details
ADMIN OPTIONS [Metrics] > [Metric category] > 'Create'
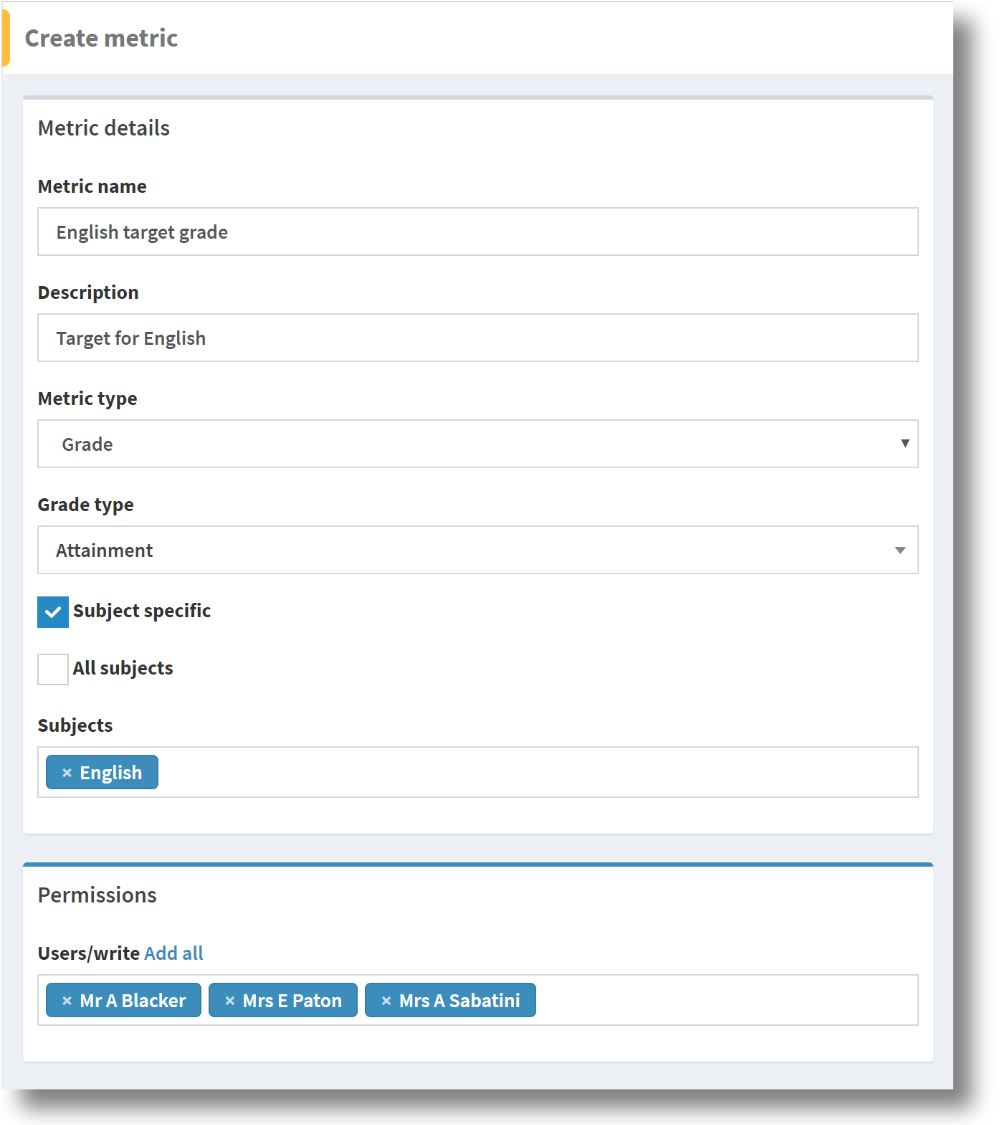
First enter the metric name and the description of the metric. You can then choose the metric type, this gives you the option to choose whether the metric is based on a grade type, an integer or a decimal number.
If you select grade, you will be asked to select the grade type you would like to use for the metric. For example, if I were creating an English target grade and I record most of my English assessments using the Attainment grade type, I would select Attainment. By using a grade type that you commonly use to grade assessments, it will be easier to compare a student's performance against their target.
Subject specific
You can then select whether the metric is subject specific. This means, does the metric relate to an individual subject and will other subjects that use this metric have a different value. For example, if I select subject specific and enter English and Geography in the subject input box, I can set this metric for groups with English or Geography as a subject, and you can give them two separate metric values for the relative subjects - the metric is subject specific.
When you click subject specific, the all subjects option will appear. By selecting this you can set the metric with a different metric value for every subject. This can be useful if you have a metric called 'Target grade' or 'Minimum attainment grade' that is applicable to every subject, but will have a different value/grade for each subject. This saves a lot of time as you don’t have to manually select every subject from the dropdown!
Not subject specific
If we do not select the subject specific box, the metric is not subject specific and is ubiquitous across all subjects. When you enter values for this type of metric, the metric value can appear in all your group markbooks, regardless of subject, against your students. This might be useful when creating behaviour or effort related metrics.
Permissions
When you create or edit a metric, you can set permissions for users to set that metric. This allows you to control metrics centrally or allow teachers to set them directly.

Setting metrics
Centrally
ADMIN OPTIONS [Metrics] > [Metric category] > 'Set metrics'
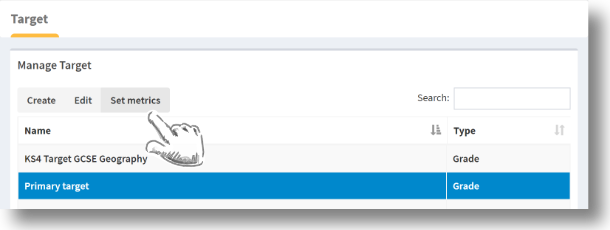
If you have admin permissions, you can set metrics for collections, groups and students through the admin options. Select the metric in the metrics table and clicking the 'Set Metrics' button.
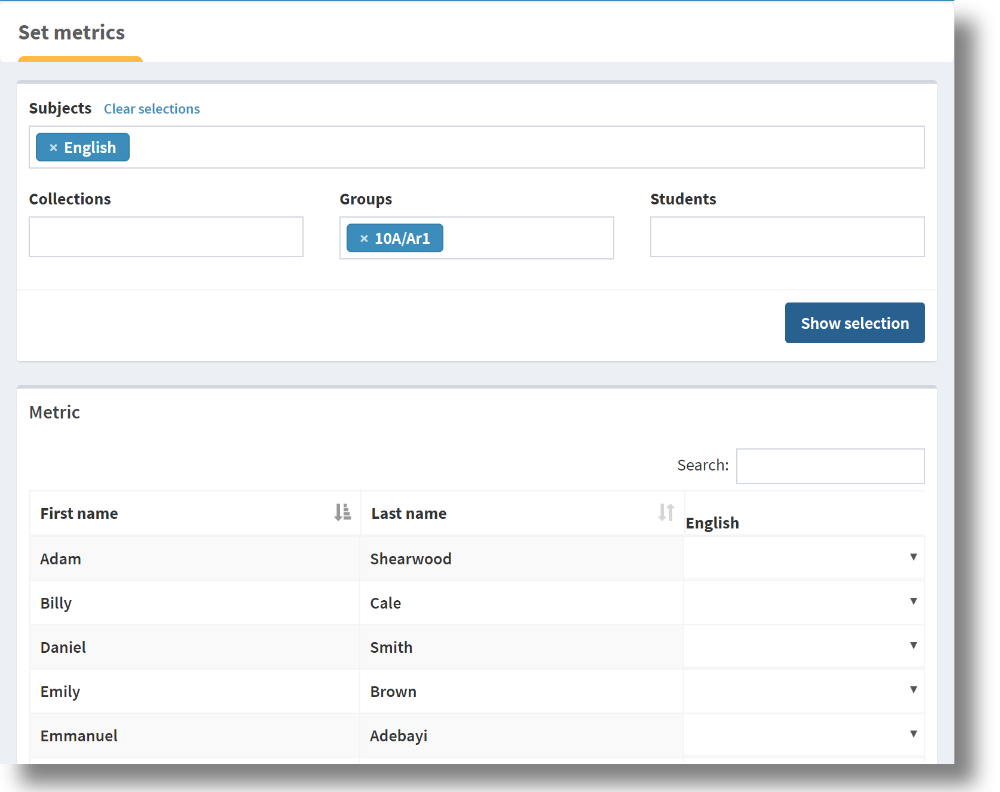
You can then select the collections, groups and students you would like to set the metric for and choose a grade or type a number against each student. When you click the save button, these metrics will appear in the metrics section of group pages and the markbook for groups that use those metrics.
By Group
SIDEBAR [Group Type] > [Group] > NAVBAR 'Metrics'
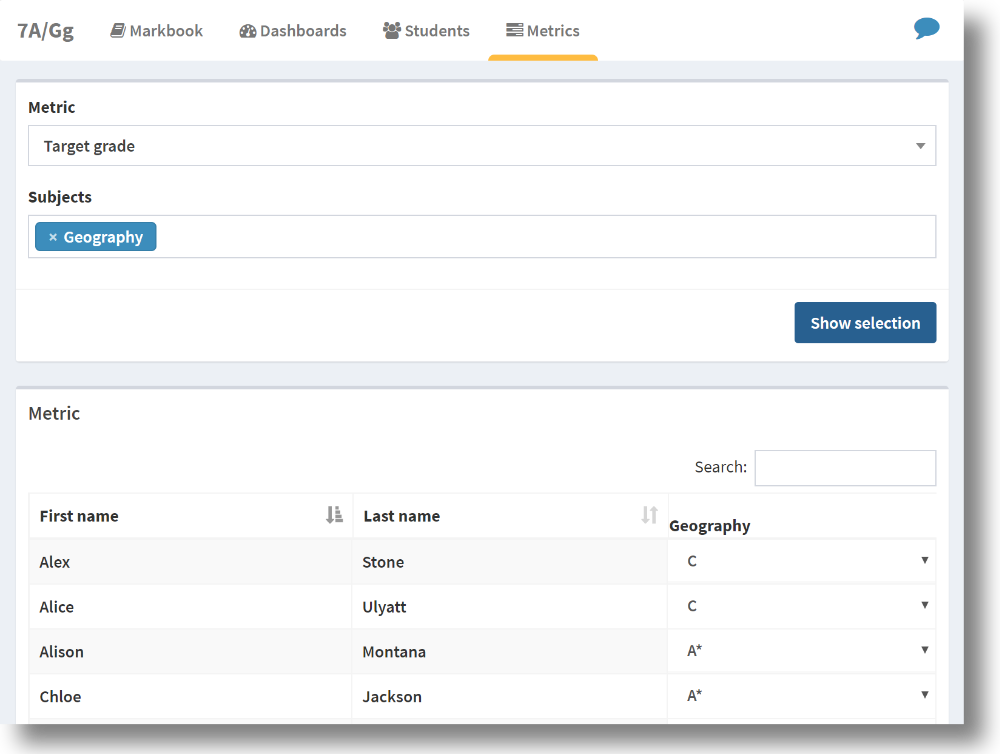
Every user that has groups will see metrics in their navbar. Here you can view metrics for a group by selecting the metric and subject (where applicable). If you have permissions to set the metric you have selected you will be able to set and change these metrics from here.
Other articles you may be interested in
4th November 2021 10 mins
Blog post
12th October 2021 10 mins
Blog post
Exams 2022 - have your say
Read more15th January 2020 10 mins
Blog post
Data driven schools
Read more3rd December 2019 10 mins
Blog post
Peer to peer grading
Read more23rd October 2019 10 mins
How to
Track SEN cohorts
Read more4th April 2019 10 mins
Blog post
Machine learning in education
Read more2nd August 2018 10 mins
How to
Using assessment breakdowns
Read more12th April 2018 10 mins
Blog post
How can data-viz help improve student outcomes?
Read more3rd February 2018 5 mins
Blog post
Time to get my head around the 1-9 grading system
Read more1st November 2017 5 mins
Blog post